All in One LED display systems are now the primary choice for corporate boardrooms, control centers, and broadcasting studios. Because these integrated platforms merge power components, controllers, and display panels into a single slim cabinet, keeping them running smoothly requires a structured care routine.
Unexpected screen failures or damaged pixels create severe disruptions and operational delays.Managing fine pitch visual hardware requires a clear practical understanding of operating temperature, signal integrity, and daily surface care.
Following a systematic upkeep schedule ensures your equipment delivers top performance throughout its operational lifecycle.Having cleared up these foundational priorities, we can examine the specific engineering details that make this technology unique.

What Makes All in One LED Display Maintenance Unique?
Integrated System Architecture
The internal design of an All in One LED display is quite different from traditional modular video walls. By housing sending cards, receiving cards, and power supplies inside a single die casting aluminum cabinet, internal wiring is reduced dramatically.
This clean setup removes common connection errors while making physical access much simpler for field technicians.
Advanced Surface Protection
Surface encapsulation technology plays a massive role in protecting the screen from daily physical wear. Using advanced COB LED display technology or GOB surface treatments gives the screen strong protection against impact, dust, and liquid spills.
These protective layers significantly reduce diode damage during routine cleaning or front module extraction.
Essential Operational Specifications
Operating parameters must be closely monitored to preserve delicate internal electronics. Fine pitch installations require stable climate conditions and clean power inputs:
-
Pixel pitch choices run from P0.7 to P1.8 for sharp detailed images
-
Standard 16:9 aspect ratio fits native enterprise video content
-
High refresh rates reaching 7680Hz stop camera screen flickering
-
Wide color depth options from 14 bit up to 22 bit processing
-
Built in heat cooling channels carved directly into lightweight cabinets
Understanding these structural features gives your technical team a clear starting point for daily maintenance.
How to Establish a Preventive Maintenance Schedule
Daily and Weekly Physical Inspections
Taking preventive action is the best way to avoid sudden screen blackouts and early wear. A simple maintenance plan keeps internal operating temperatures low, protects delicate screen coatings, and preserves color balance across all cabinet modules.
Combining quick visual checks with basic environmental monitoring helps you catch small hardware issues before they turn into major faults.
Dust Management and Cleaning Schedules
Routine servicing should be grouped by task frequency and scope. Technical teams can review our LED display maintenance guide to align their internal work schedules with proven field practices:
-
Weekly tasks: Check for dark pixels and gently wipe off surface dust
-
Monthly tasks: Clear out cabinet air vents and verify data cable connections
-
Quarterly tasks: Test power supply output voltage and inspect cooling fans
-
Twice yearly tasks: Save fresh configuration files and run full color calibration
Once your team masters this preventive care schedule, the next step is handling physical module swaps safely.
Step by Step Front Access Module Replacement and Calibration
Magnetic Tool Extraction Techniques
Front access design lets your staff swap out modules without taking down the entire display structure. By using specialized magnetic vacuum tools, a technician can pull a single LED panel straight off the front face.
This approach speeds up repair work, cuts down room downtime, and eliminates the need for service space behind the display wall.
Maintenance for Touch Enabled Cabinets
Interactive displays have slightly different physical care requirements. When servicing an interactive meeting LED display fitted with an infrared touch frame, technicians must keep the frame borders free of dust buildup.
Dust along the inner bezel interferes with touch tracking sensors, making quick border wipes essential for smooth interactive presentations.
Front Access Versus Rear Access Comparison
Proper cabinet alignment and careful tool handling protect screen surface flatness. Comparing front service designs against older rear access structures shows clear practical benefits:
|
Feature Dimension
|
All in One Front Service
|
Traditional Rear Access
|
|
Service Access Point
|
Direct front extraction with vacuum tool
|
Needs rear room access or pull out mounting brackets
|
|
Module Swap Speed
|
Takes 3 to 5 minutes per panel
|
Takes 20 to 40 minutes with back panel removal
|
|
Servicing Downtime
|
Minimal impact on ongoing room usage
|
Causes long operational interruptions
|
|
Cable Layout
|
Internal hidden channels inside chassis
|
Complex external power and data wiring looms
|
|
Space Requirements
|
Zero clearance needed behind the cabinet
|
Needs at least 60 centimeters of open rear space
|
Knowing how to handle module removal prepares your team to troubleshoot visual glitches quickly and safely.
Troubleshooting Common All in One LED Display Faults
Diagnostic Protocols for Common Screen Faults
Following a step by step troubleshooting process helps IT staff fix visual glitches without causing accidental hardware damage. When dealing with partial image loss, signal corruption, or power issues, always test external video sources before opening up internal cabinet parts.
Quick Action Steps for On Site Technical Issues
-
Dark display module: Check internal DC power lines and review receiving card indicator lights
-
Screen flickering: Match your media player refresh rate to the display driver specs
-
Color patch errors: Run brightness calibration in the control software to balance module output
-
Unresponsive touch screen: Wipe clean the infrared bezel border and check the USB connection
-
Cabinet overheating: Clear away dust blocks around the back cooling channels to restore airflow
Resolving these small technical glitches early protects your broader hardware investment and keeps operating workflows smooth.
How Does All in One Design Improve Operational Reliability?
Reduced Component Vulnerability
Investing in integrated display technology offers clear operational benefits across the full product lifespan. The unified cabinet design lowers shipping weight and makes installation much simpler. Having fewer loose cables, external sending boxes, and separate power supplies means fewer hardware parts fail over years of daily operation.
Spare Parts Management and Pixel Density Handling
Overall system uptime depends heavily on your chosen pixel pitch. While super fine pitch models like P0.7 offer incredible visual detail, they require extra care during physical handling.
Keeping a small stock of matching factory spare modules allows your team to fix broken panels instantly, protecting your indoor LED video wall setup from long service delays.
Beyond basic spare parts planning, different room environments require tailored maintenance approaches.
Tailoring Maintenance Strategies by Application Scenario
High Hours Traffic Control Rooms
Operating conditions vary depending on where your display is installed. Control room setups operate continuously, which means cooling fan checks and heat monitoring are essential to prevent driver chip burnout. Displays in monitoring hubs must maintain stable brightness levels and continuous signal redundancy.
Corporate Boardrooms and Media Studios
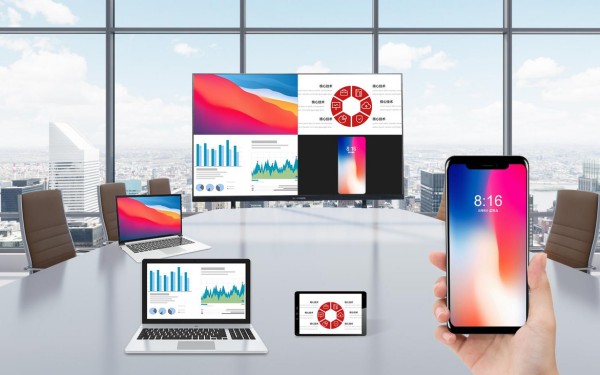
Executive meeting rooms and TV studios place maximum priority on screen surface clarity and quiet operation. Conference spaces need routine touch sensor recalibration and surface wiping because people interact with the screen directly.
Studio installations need precise color temperature checks so the display looks crisp and natural under bright camera lighting.Selecting the right maintenance plan depends directly on how hard your display works each day and the technical skills of your local staff.
When Should You Contact a Professional LED Display Manufacturer?
Identifying Complex Internal Hardware Failures
While daily cleaning and basic panel swaps can easily be handled by local staff, complex electronic faults require factory support. Issues like repeating power trips, main board failures, or internal water damage require specialized testing tools to fix safely without damaging nearby parts.
Benefits of Factory Direct Engineering Support
Working directly with an experienced manufacturing team gives your facility long term operational peace of mind. Factory technicians bring over two decades of industry experience, providing advanced calibration tools, exact color matched spare parts, and direct technical support throughout your display service life.
Frequently Asked Questions
What factors impact the technical complexity of All in One LED display maintenance?
Servicing complexity depends on pixel pitch density, surface coating treatments, cabinet access design, and component integration. Finer pixel pitch screens require specialized magnetic extraction tools and precise module calibration to ensure seamless visual alignment.
For direct technical advice or customized maintenance plans tailored to your specific screen specifications, contact our engineering team directly.
Can standard household glass cleaner be used on an LED display surface?
No, standard glass cleaners containing alcohol, ammonia, or harsh chemicals should never be sprayed onto an LED screen. These chemicals break down protective anti glare coatings and can ruin the protective resin around fine LED diodes.
Always use an ESD safe micro vacuum, clean dry microfiber cloths, or manufacturer approved optical wipes.
What immediate steps should be taken if liquid spills onto the display cabinet?
Shut off the main electrical breaker immediately to stop internal short circuits and permanent component damage. Do not attempt to turn the display back on until qualified technicians have removed the affected modules, thoroughly inspected the internal driver boards, and verified that all moisture has dried completely.
How often should system configuration files be backed up?
System configuration files should be backed up right after initial installation and immediately following any major screen calibration. Storing updated RCFG files on local servers and cloud drives ensures fast software recovery if a receiving card needs replacement during emergency repairs.
Conclusion
A well planned maintenance routine is essential to get the best visual performance and longest service life out of your All in One LED display installation. Combining regular surface cleaning, environmental monitoring, and quick troubleshooting minimizes operational downtime while preserving display quality. Integrated display designs simplify daily upkeep, but staying consistent with basic servicing protocols keeps your screen looking sharp and reliable year after year.
Partnering with an experienced manufacturer ensures your facility enjoys dependable hardware backed by expert engineering support. If you are planning a new screen installation or need technical help with your current display setup, contact our team today to discuss complete All in One LED display solutions.




