Deploying a large display in a boardroom or control hub used to mean dealing with confusing wiring diagrams, bulky mounting frames, and endless technical troubleshooting. Modern integrated systems have streamlined much of this work, but skipping basic steps during wall preparation, electrical planning, or signal setup can still lead to alignment errors and hardware failure.
Taking time to understand the proper installation sequence helps ensure reliable display performance throughout its operational lifespan.
Before hanging any heavy hardware or connecting main power feeds, taking time to audit the installation site prevents structural and electrical surprises during assembly.
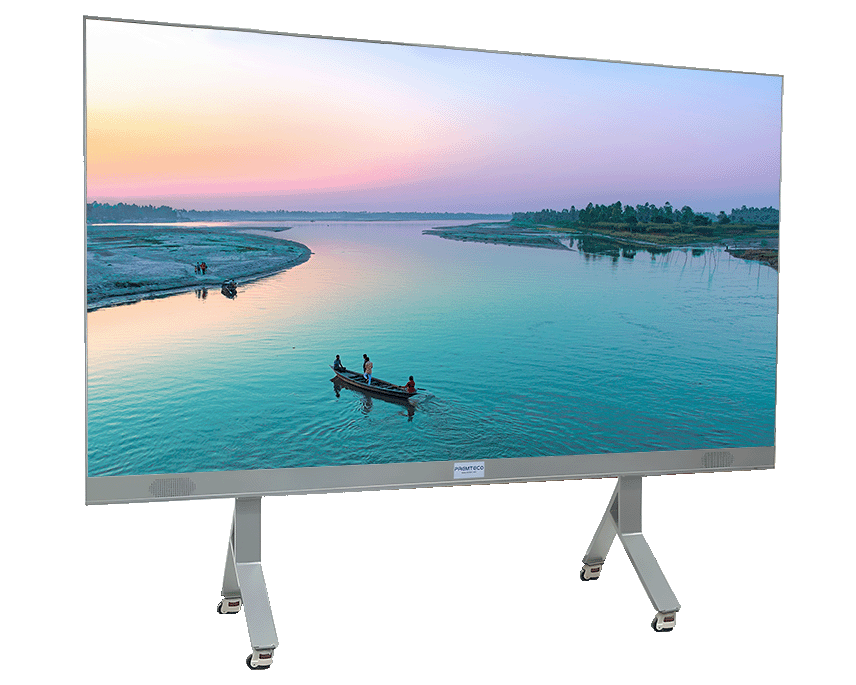
How to Prepare Space for an All-in-One LED Screen
A smooth installation always begins with a careful evaluation of the mounting environment. Large format displays concentrate significant physical weight onto a vertical surface, which makes evaluating wall load capacity essential before installing the first anchor bolt.
Standard interior drywall alone cannot support heavy commercial displays without reinforced backing structures.
Evaluating Wall Load Capacity
Structural engineers must inspect the target wall to determine whether standard anchoring into steel studs is sufficient or if a custom support framework is required.
The total weight of the display, mounting structure, and related hardware should be considered together during site planning. Confirming these requirements before installation helps ensure the wall structure can safely support the complete system.
Assessing Electrical Requirements
Electrical planning needs equal attention to prevent unexpected circuit trips when the display powers up. Confirm that dedicated AC lines are available, factoring in an average power draw of around 170W per square meter.
Additionally, check ambient room temperatures and leave proper rear clearance behind the screen so air can circulate freely.
|
Installation Stage
|
Key Technical Focus
|
Operational Objective
|
|
Phase 1: Structural Preparation
|
Wall load verification and brackets
|
Ensure mechanical load safety
|
|
Phase 2: Hardware Assembly
|
Cabinet alignment and module installation
|
Achieve seamless surface alignment
|
|
Phase 3: Electrical and Signal
|
Concealed cabling and power input
|
Maintain stable signal transmission
|
|
Phase 4: Calibration and Setup
|
System boot, wireless, and brightness
|
Optimize visual performance
|
With the room fully checked and prepared, technical crews can safely move on to physical screen assembly.
How Do You Install an All in One LED Screen?
Following a logical step by step assembly sequence protects delicate optical components and helps keep adjacent cabinets properly aligned.
Mounting the Structural Frame
Secure the main wall bracket or mobile stand directly into verified load bearing studs or concrete. Use a precise laser level across the entire mounting rail because even a small tilt at the base can become more noticeable as additional screen sections are installed.
Aligning the Display Cabinets
Set the enclosure frames onto the horizontal mounting rail one by one. The All in One Series features a cabinet structure designed to support carrying and installation, while proper alignment remains essential for maintaining a seamless display surface.
Connecting Power and Signal Cables
Once the frame is secure, route power and data cables through the internal chassis channels to keep them hidden from view.
Connect the display to main power and test incoming video feeds across HDMI and other common digital video inputs to verify signal stability before completing the display assembly.
Once the physical hardware is securely mounted and receiving power, adjusting software settings allows the display to operate according to project requirements.
How Do You Configure an All in One LED Screen?
Modern all in one displays combine display, processing, and connectivity functions, so several system settings need to be configured before use.
Configuring the Operating System
Access the main administration panel to connect to local networks, configure system settings, and assign device names.
If the display runs an integrated Android environment or an optional Windows PC module, complete the initial system setup and network configuration before handing the system over to end users.
Setting Up Wireless Display
Set up wireless content sharing so team members can cast laptops or tablets without plugging in cables.
Adjust multi window layouts to support split screen viewing for up to four or nine distinct video sources during collaborative meetings. Finally, fine tune display brightness and color output to match room lighting.
Configuring onboard software ensures seamless daily operation, but avoiding physical assembly mistakes is just as important for protecting the hardware investment.
What Installation Problems Should You Watch For?
Even experienced technicians can run into problems if site preparation or component handling gets rushed.
Managing Wall Flatness Variations
Minor unevenness in backing walls can create small alignment gaps between adjacent cabinets, leaving visible lines across active video content.
Checking wall flatness before mounting the structural frame helps technicians identify potential alignment problems early.
Controlling Power Inrush
Electrical issues can occur when teams calculate steady state power draw but overlook initial startup current spikes.
These temporary increases in current can trip circuit breakers during system startup, making proper electrical planning important before commissioning the display.
Handling LED Modules Correctly
Over tightening module fasteners can place unnecessary mechanical stress on display boards and cause surface distortion. Installation and maintenance requirements may also vary depending on the display structure and service design.
Different LED packaging technologies can also affect how display components are protected and maintained. For example, a COB LED displayuses a different packaging structure from conventional LED display designs.
When selecting an all in one display, buyers should consider module protection, front service requirements, thermal management, and other factors that may affect installation and long term

How Do You Maintain an All in One LED Screen?
Proactive maintenance routines help preserve image quality and protect the long term value of commercial display equipment.
Replacing Front Service Modules
Front service display designs allow technicians to handle repairs without dismantling the entire wall structure.
Display systems provide direct front access to modules, receiving cards, and internal power units using specialized vacuum or magnetic front extraction tools.
Managing Thermal Conditions
Inspect rear ventilation channels regularly to clear away dust buildup that can restrict airflow.
Clean optical surfaces using soft microfiber cloths and approved static free cleaning sprays to avoid damaging anti glare coatings. You can also monitor system operating status through built in diagnostic tools to identify potential power supply issues before a failure occurs.
A reliable display system depends on consistent manufacturing processes, making supplier selection a critical step in project planning.
How Should You Evaluate an All in One LED Screen Manufacturer?
Choosing an equipment supplier requires looking beyond basic product specification sheets.
Evaluating Engineering Support
A dependable manufacturing partner provides thorough pre-sales site evaluations, precise cabinet engineering, and responsive technical support after installation.
Custom projects often require tailored cabinet dimensions, unique mounting brackets, or specialized power distribution setups to fit specific architectural constraints.
Considering Manufacturing Experience
Experienced suppliers analyze room dimensions, ambient lighting, and heat loads to recommend the right pixel pitch for corporate boardrooms or command centers.
With experience dating back to 2003, an established LED display manufacturer can provide practical guidance on product selection, installation requirements, and project configuration.
Frequently Asked Questions
What structural modifications are required when installing an all in one screen on drywall?
Standard interior drywall cannot directly support commercial display weight. Installation requires anchoring mounting brackets directly into internal structural studs or installing a reinforced mounting subframe behind the wall to distribute the total display weight safely.
What factors primarily influence the total price of an all in one display project?
Total project costs depend on display surface area, pixel pitch density, integrated computing options like onboard Android or Windows modules, structural mounting requirements, and specialized protective coatings. For accurate pricing based on your specific installation requirements, contact the PTCLED engineering team directly.
How do technicians perform module replacement if a single pixel area suffers physical damage?
Front access display systems utilize specialized vacuum or magnetic front extraction tools. Technicians apply the tool directly to the front face of the affected module, release internal retention mechanisms, and pull the module forward out of the cabinet frame without removing surrounding panels.
What heat management precautions should be taken when recessing a screen into custom wall cabinetry?
When recessing a display into custom millwork, technicians must maintain a perimeter ventilation gap around the chassis to allow convective air circulation. Choosing front service COB panels with efficient thermal management further helps prevent heat accumulation behind integrated wall features.
Conclusion
Installing a commercial display system requires careful attention to room preparation, precise mechanical alignment, and accurate software calibration.
Following a structured assembly sequence and selecting lightweight, front serviceable hardware allows enterprise clients to achieve reliable visual performance while keeping installation downtime to a minimum.
Choosing high quality display hardware backed by experienced pre sales engineering support helps ensure your visual system operates smoothly for years.Contact our technical team today to discuss your project requirements or request a custom quote for your upcoming installation.




